What is Cyanotype?
It's a photographic printing process that produces a cyan-blue print, same as those old school blueprints one would find in architectural offices. In fact, technical drafters and engineers used the process well into the 20th century as a simple and low-cost process to produce copies of drawings.
The cyanotype process was first introduced in 1842 by English scientist Sir John Herschel. He was an astronomer trying to find a way of copying his notes.
Here is a step by step to see how the process is being done:
Here's the prep. The 2 important chemicals:
ammonium iron(III) citrate and potassium ferricyanide.
Remember to prepare this in a shaded area. :)
Mix the 2 chemicals in a 1:1 ratio and
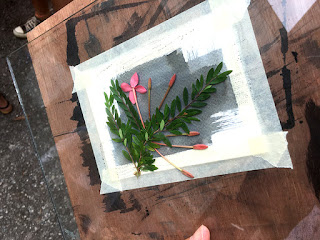
smear a couple of drops on your canvas
Place and design your flat objects or negatives on the canvas
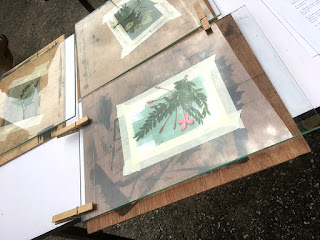
Flatten your art with a piece of glass with pegs
and place it in the sun for about 10 mins. If it's an
overcast day, maybe 30 mins might do the trick.
Notice the darker coloured background... you're ready
for the next step.
Dip your art in water to further darken the cyanotype print
Once the colour changes to a darker blue, hang it out to dry
Voilà !
If you are interested in trying out cyanotype, kits can be purchased here:


